Finally I have my new Zebra blind installed and configured with my Vera home automation system.
As previously mentioned I have not physically connected a wall switch to the Qubino DC Flush Shutter module, as I am utilizing my existing wall switch connected to a Fibaro Roller Shutter 2 module for my curtain track, you can see in the video here how it's working with this new Zebra blind.
The wall switch is a single click up to open the curtains, a single click down to close the curtains and now thanks to some programming logic in Vera / PLEG a double click up on the wall switch opens the new Zebra blind, a double click down closes the Zebra blind and a triple click down opens the "Slats" of the Zebra blind, by opening / raising the blind 4% to let in daylight but still have some privacy.
I have also programmed up my existing Aeotec Minimote Z-Wave remote control using buttons 3 and 4. I am running device toggle state scenes in Vera to open and close either the curtains or blind etc.
I can also control the Zebra blind from the Imperihome Android control app, screen shots below or via voice commands to Google Home / Alexa.
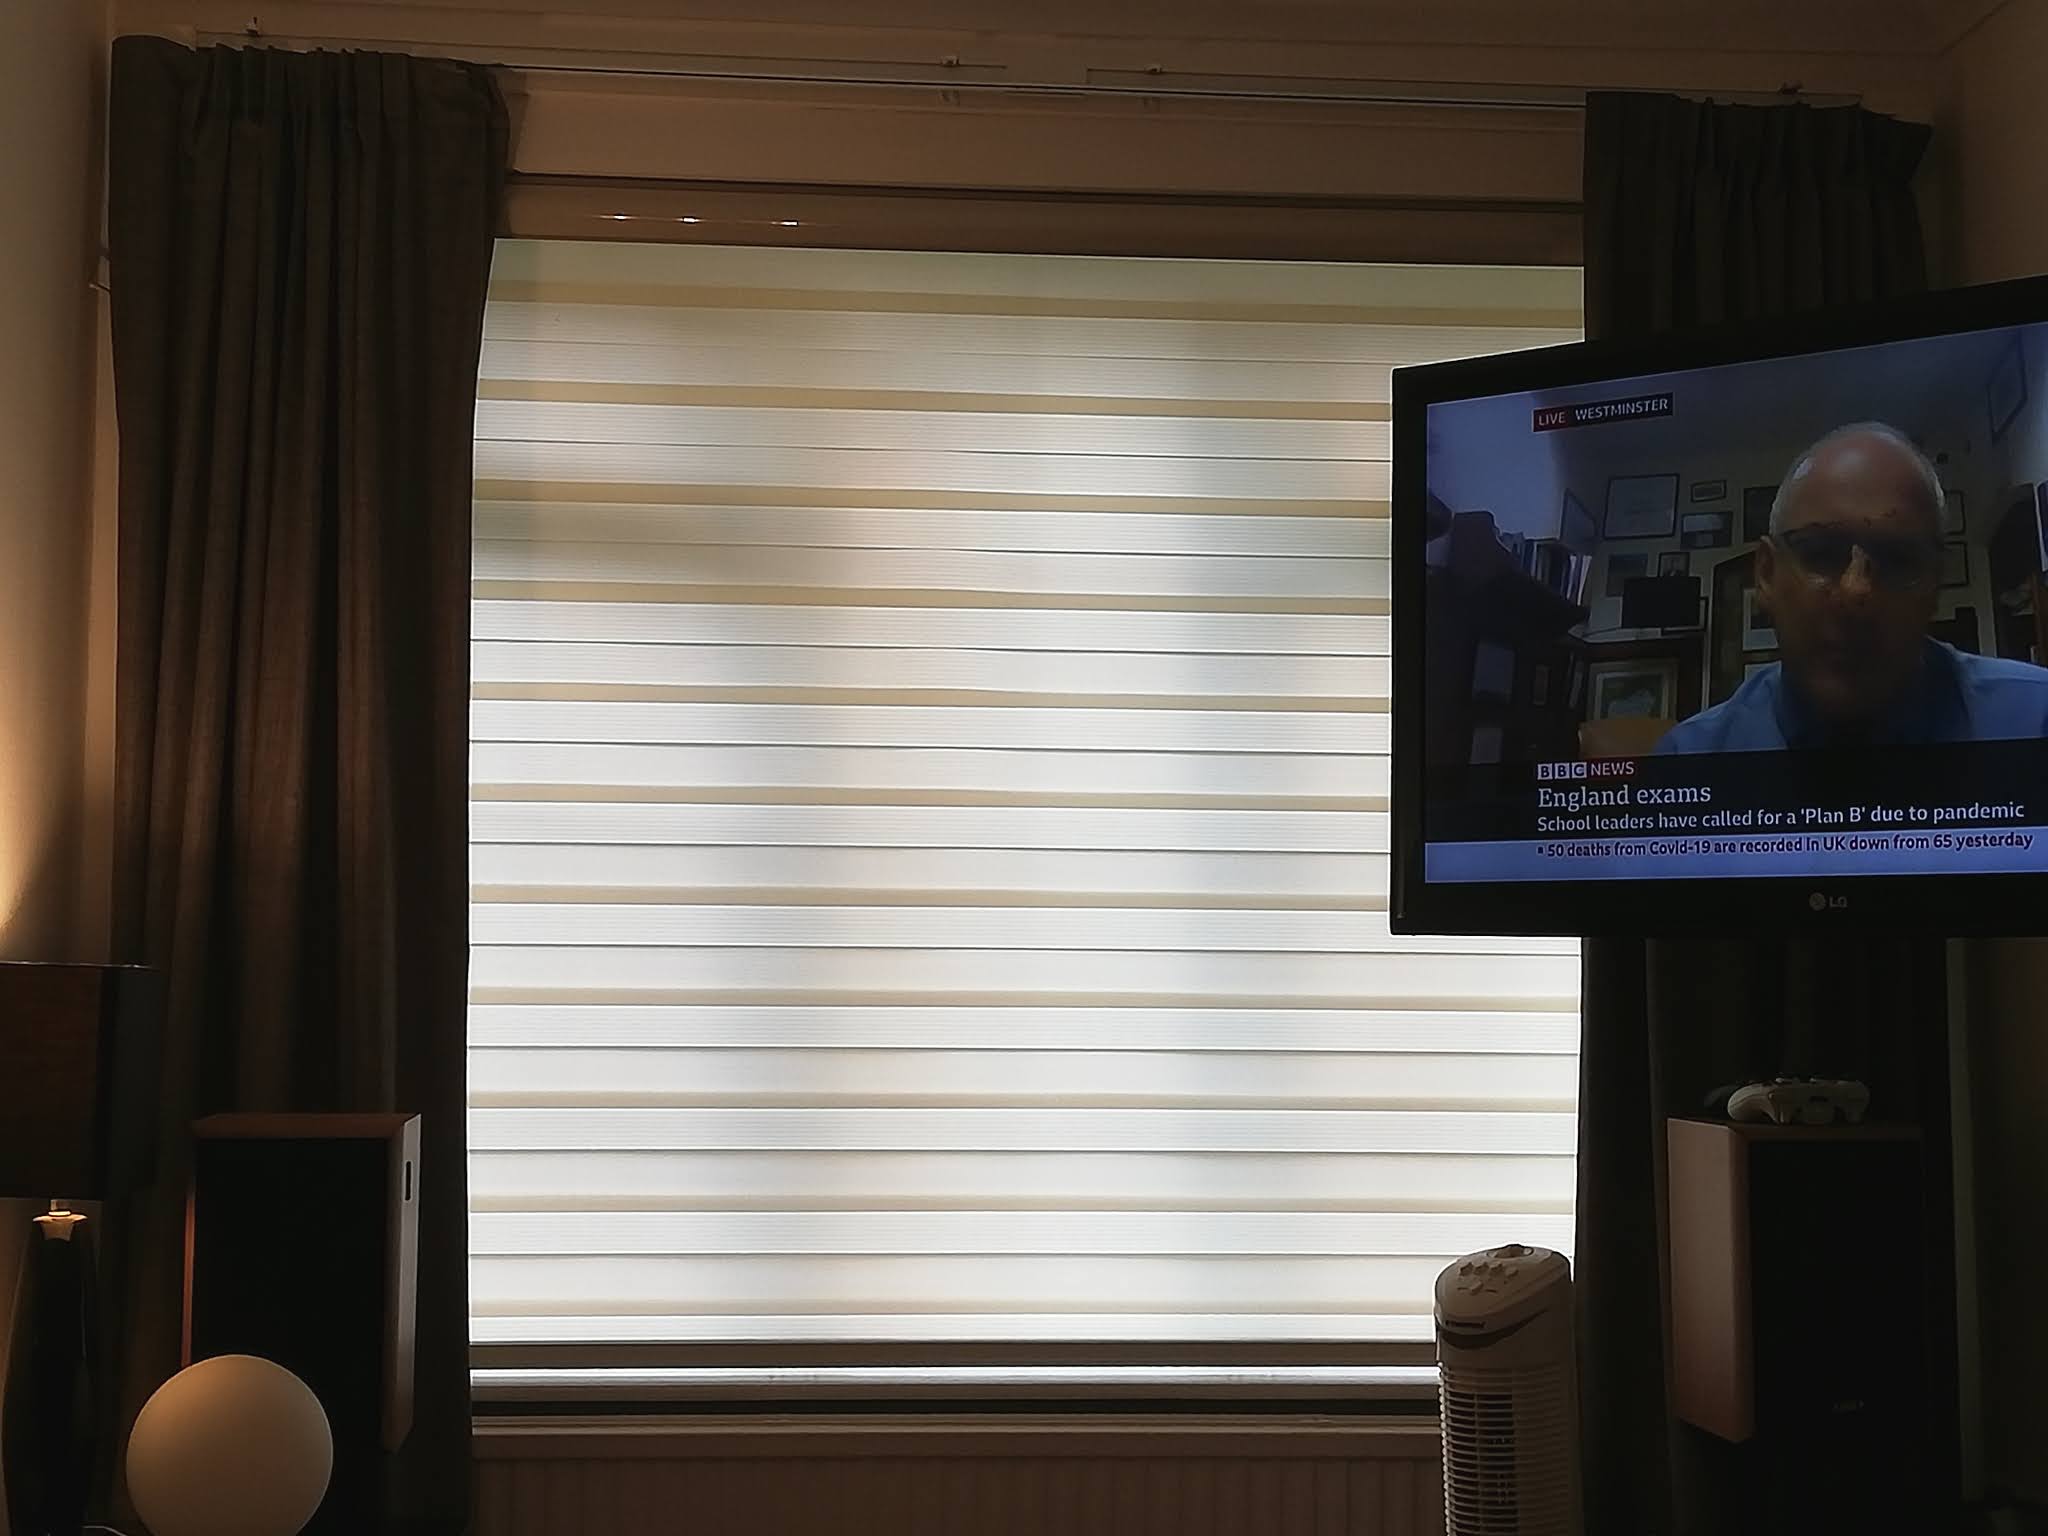
Here are some photos of the blind mounted:
Blind Closed:
Blind "Slats" Opened 4% raised:
Header rail or valance:
Here you can see the Qubino DC Flush Shutter module and then hidden away behind the blanking plate:
It is not the quietest or quickest blind motor but I expected that, DC motors tend to make more noise, than say my 240V AC Dooya tubular motor I have installed in my kitchen.
Youtube video here of the blind in action, with the Aeotec Minimote and the wall switch.
Some screen shots of the Imperihome control app on my Android tablet.
The device highlighted in green is the actual Qubino DC Flush Shutter device.
Also highlighted in blue, I created a virtual on / off switch device in Vera and used some PLEG logic to enable me to have a device in the Imperihome app to "turn on" open the blinds "slats" to 4% and "turn off" close the blind again fully.
This enables me to more easily open the blinds using the app to the required 4% for the "slats" to allow more daylight in, rather than me guessing what is 4% on the actual devices percentage slider.
And this it how the Imperihome app looks when the blind is fully closed:
Summary
Overall for the money I spent I am happy with the setup and the look of the blind.
I am not affiliated with the supplier on Aliexpress, however Scott and their team at the Runxin Blinds Store are very good and I have purchased all my motorised window coverings from them.
You can contact Scott to discuss your requirements and obtain a quote for the various motorised window covering solutions they offer.
If you do contact them, please be sure to mention you were referred by "The Media Center Blog" however. From the store home page you can use the "Contact Now" link.
I will be covering the installation of the blind, the wiring and the calibration of the upper and lower limits of the tubular motor in this part.
Here is a PDF document with the instructions for the ES2512-1.5/28 motor. In order to calibrate the motor I needed to buy a temporary DPDT momentary rocker switch. I bought this cheap one off eBay.
If you've not sure how to wire up a DPDT switch you can watch this Youtube video here where it is explained.
The middle two pins on the switch go to the motor.
Then from your power supply connect the positive and negative (ground) wires to the top two pins.
Then you loop over a small cable from the top positive power pin to the lower opposite positive power pin.
Then you loop over a small cable from the top negative (ground) power pin to the lower opposite negative (ground) power pin.
You can then test the switch up and down by pressing the buttons on the switch. Next I needed to follow the instructions for the motor to calibrate its upper and lower limits.
From the user manual:
Entering into the state of programming:
Keep the switch on the “UP” position, and then, keep down the “k1” key on motor head for more than 6 seconds.
Motor gives out quick short alarm “Di, Di, Di” means the motor is entering into the state of programming.
Setting of upper limit:
Keep the switch on “STOP” position, and then keep it on “UP” state, the motor continuously rolling up . When the
shade close to the end-point of the upper limit, keep the switch on “STOP” state, motor stops operation. Then
press “UP” a time and then press “STOP” a time, the shade will move towards upper position a little, Repeat the
above operation again and again until the shade reaches the end-point of the upper limit.
Setting of lower limit:
Keep the switch on “DOWN” position, motor gives out quick short alarm “Di Di,Di”. After 2 seconds, the shade
continuously rolling down. When the shade is close to the end-point of the lower limit, keep switch on “STOP” state,
At that time, press “DOWN” a time and then press “STOP” a time, the shade will move towards lower position a
little. Repeat the above operation again and again until the shade reaches the end-point of the lower limit.
Confirm programming:
Keep the switch on “UP” state, motor gives out quick short alarm “Di, Di ,Di” means the above limit settings are
effective.
Once I was happy the blind was working OK with the DPDT switch, it was time to remove that and wire in the Z-Wave Qubino DC Flush Shutter module in its place.
Here is the wiring diagram from the Qubino user manual.
I don't plan to wire in a wall switch however, instead I will be utilizing the existing wall switch for my curtain track connected to a Fibaro AC Roller Shutter module. I will just program the double click up and double click down triggers of the Fibaro module to control the Qubino module, this will be programmed in Vera / PLEG logic engine.
Here is a close up:
Positive / Negative wires from your power supply go to + / - on the Qubino module, I am just using a 12V 2A plugin power supply I had laying around the house from something else.
Q1 / Q2 go to the motors wires for up / down.
l1 / l2 go to your wall switch if you have one, and also you need another positive wire from the power supply to the common on the wall switch.
TS connects to the external temperature sensor if you have one.
Once the Qubino module is wired up you can then pair it to your Z-Wave controller hub in my case a Vera Plus.
The user manual for the Qubino DC Flush Shutter can be seen here.
Now we need to also calibrate the Qubino module. (Or do we?)
From the user manual:
13. Flush Shutter DC Calibration
Automatic calibration
Automatic calibration is a process during which the Flush Shutter DC learns the position of the limit switches.
Shutter positioning calibration
(par. 71 set to 0)
There are two options to calibrate the device:
• Calibration through main gateway (hub) UI
1) Include the device into the Z-wave network according to the instructions for inclusion.
2) Set the parameter 78 (Forced Flush Shutter DC calibration) value to 1.
3) Flush Shutter DC performs the calibration process, completing full cycle - up, down and up again.
4) Set the parameter 78 (Forced Flush Shutter DC calibration) value to 0.
• Calibration through the inputs I1 and I2
1) Include the device into the wireless network, according to the instructions for inclusion.
2) Quick press the switch/push-button connected to I1 input and wait until the Shutter DC reaches the upper limit switch.
3) Quick press the switch/push-button connected to I2 input and wait until the Shutter DC reaches the lower limit switch.
4) Quick press the switch/push-button connected to I1 input and wait until the Shutter DC reaches the upper limit switch.
As I don't have a switch connected to the Qubino module, I used the "Calibration through main gateway" option.
Setting parameter 78 to 1 byte dec with a value of 1. The blind then lowered and raised to do the calibration process, however there was a big problem, the calibration process didn't move the blind to the fully down and fully up limits of the motor. It only moved the blind up and down just a little bit.
I was unable to figure out why and in the end the trick to get it working, was to unpair the Qubino module from Vera and start over and pair it again.
However this time I did not set any calibration parameters on the Qubino module. As is, paired to the Vera, I was able to move the blind fully up and down via the Vera controller and it was then working OK. So in my case, in the end I did NOT use any calibration parameters on the Qubino DC Flush Shutter module.
Here are some photos of the brackets and the Qubino module.
Fitting the brackets up in to the window reveal was easier than I expected, I didn't hit the concrete lintel and was able just to use regular rawl plugs and long screws and the brackets were secure enough.
In the final part we will be looking at the blind in operation.
I was keen to see which motor was actual in the blinds as I hadn't managed to obtain that information from the seller on Alixpress. I had just specified I needed a standard 12V DC roller tube motor with no inbuilt RF radio.
So I took the motor out of the roller blind tube to take a look at it. The motor is a Bofu ES2512-1.5/28.
Its a brand I've not heard of before but appears to be the same brand of motors sold on Amazon by "Rollerhouse".
The motor is smaller in size than I was expecting so hope its going to be powerful enough for my size of blind.
There are no mechanical limit screw holes like there are on my AC Dooya tubular motors. However the top and bottom limits can be set on the motor by pressing the button and following the directions in the supplied instructions, which you can see below.
I didn't take a photo of it but the inside of the tube has a notch, similar to this image I found on Google.
This is the other end of the motor that slides in to the tube and has to be aligned over the notch in the tube.
Enclosed Instructions:
This is the other end of the tube from the motor.
I pulled out the end to take a look at it.
There are three supplied brackets which clip in to the header rail like this.
These brackets will have to be screwed up in to the Windows lintel inside the reveal, which I hope isn't going to be a major hassle but might be if its solid concrete and not much gap between it and the plaster work for any fixings.
In Part 4 I will be fitting the blind and taking a closer look at it as I haven't been able to pull out much of the fabric yet with the motor installed and not powered up etc.
Installation of the Qubino Flush Shutter DC module.
The whole reason I opted for the Qubino DC module is because I couldn't be bothered chasing out the walls for mains AC cables that would be needed for a Fibaro Roller Shutter module.
So I just installed a deep surface mount back box in the top corner of the window reveal and ran some low voltage bell cable down to a nearby plug socket area.
The Qubino module will sit inside the back box and a blanking cover plate will hide it.
Optional Temperature Sensor Probe.
An optional temperature sensor probe can be purchased and connected to the Qubino Flush Shutter DC module. You can purchase these from Vesternet here for £12.56.
However that seemed a bit pricey for what is just a DS18B20 Digital Temp Probe. So I made my own for about £4.
I already had a spare one in a draw that I previously purchased from Aliexpress here for about £2 shipped.
I just needed to find a suitable connector to be able to connect it to the Qubino module.
The correct connector needed is a Micro JST 1.25mm Connector Plug and I found one on eBay for £2.
I then just soldered the two together using this diagram.
JST Connector - Yellow -> Temp Probe - Black (GND)
JST Connector - Black -> Temp Probe - Yellow (DQ)
JST Connector Red -> Temp Probe - Red (VDD)
I then drilled a hole through the wall out from the back of the surface mount back box, so I could have this as an outdoor temperature probe.
Including the Qubino Flush Shutter DC module in to the Z-Wave Vera controller hub.
The temperature sensor probe should be connected to the Qubino module before you pair the module to your Z-Wave controller hub.
I paired the Qubino module to my VeraPlus Z-Wave controller hub, however I ended up with four devices rather than just the two that I was expecting to see.
It added a parent device which I named “Lounge Blind” and assigned it to my Lounge Room.
It also added a child device for the Temperature Sensor, which appeared to be working and changing values.
However its also added two additional child devices which I was not expecting.
Its added another child device for “Window Covering”.
If I press the open or close buttons on this “Window Covering” child device, then the parent “Lounge Blind” device is also changed to open or closed.
And another child device which I have no idea what it is.
Seems these two extra devices are phantom or ghost devices, so I just hid them from the Vera UI7 web GUI. by adding two lines of code to the Startup LUA.
Where number 502 and 503 are the device ID numbers of the child devices you want to be hidden.
luup.attr_set("invisible","1",502)
luup.attr_set("invisible","1",503)
In Part 3 we will have a look at the Zebra blind that has arrived from China.
I've been looking for some blinds for my living room window. I already have motorised Z-Wave black out curtains fitted, however I wanted some light coloured blinds sat behind the curtains so I could let light in but still have some privacy.
Ideally I probably would have gone for wooden Venetian blinds, however there are limited cheaper options in the EU to control the tilt opening and closing on those kinds of blinds, Somfy do them but not so cheap.
The best DIY solution I have seen is the Z-Wave iBlinds Kit which is a Z-Wave enabled motor that sits directly hidden away in the header rail of the Venetian blinds, however these are only currently available for the US market, although I have been told by iBlinds that they are planning to release an EU model at some point.
The other option is them crappy looking chain cord pulley motors that look unreliable. Although I have a friend who rates the Brunt Blind Engine ones.
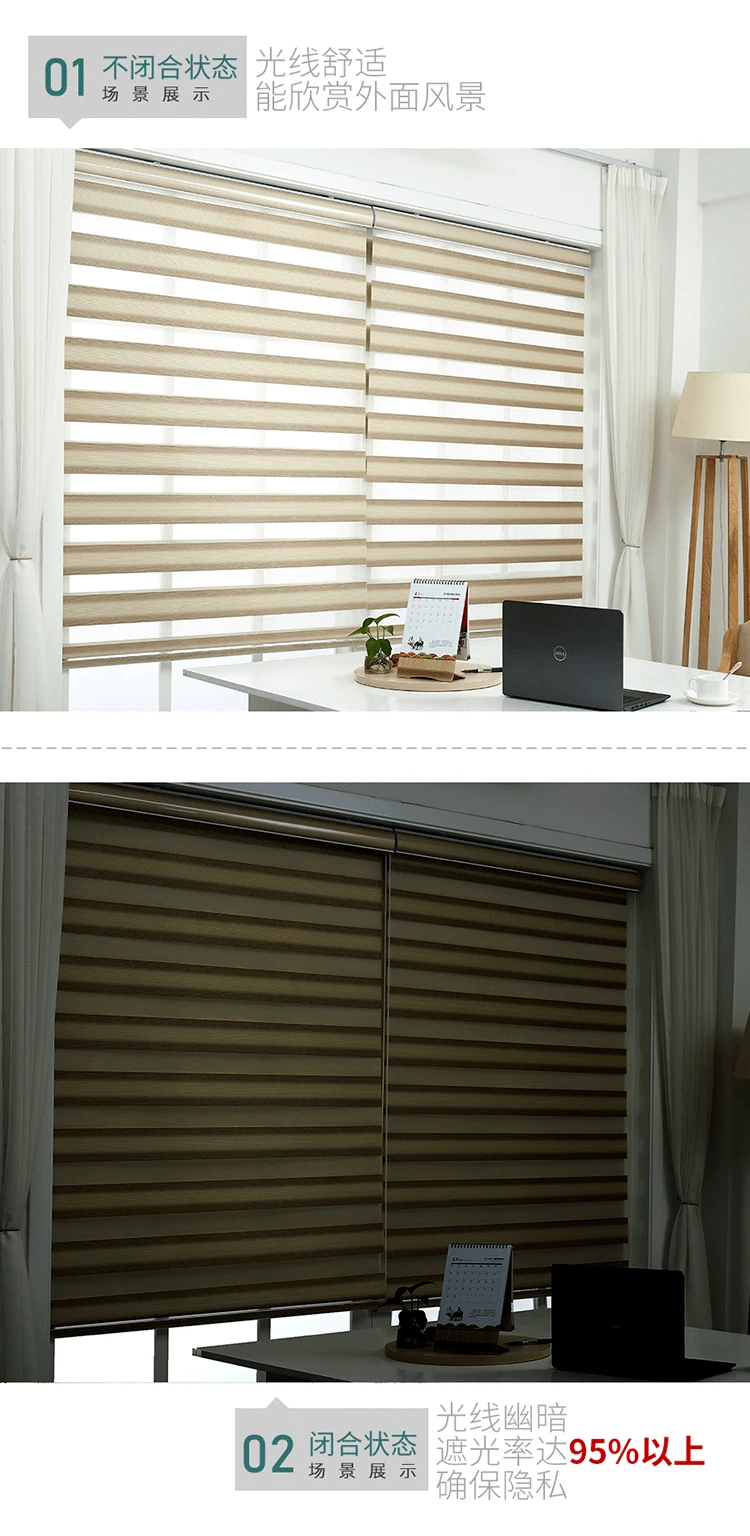
I then saw blinds called Zebra blinds, which is basically a roller blind, however they have a sheer part to the dual layer fabric, so you can either have them in full privacy or adjust them to allow in some light. Watch this random Youtube video better than me trying to explain what they are.
Roller blinds are much easier to integrate in to a Z-Wave network as there are plenty of roller shutter modules out there you can use. I previously used a 240V mains voltage roller tube motor and a Fibaro Roller Shutter module for the blinds in my kitchen.
Looking on Aliexpress however, most motorised Zebra blinds for sale were either battery operated motors which I didn't want, or mains voltage motors, I wanted to avoid having to chase mains electric cables in to the walls again as I have just painted all of my lounge room, so I was looking for a low voltage 12V DC motor that could be used with a thin surface mounted cable.
Most of the motors being sold as a complete Zebra blind kit also came with an RF 433Mhz remote control. I believe you cannot use an RF motor and then attached a Z-Wave roller shutter to it, as the motor is still expecting the signal to come from the RF remote control. My same friend also tried a Qubino Flush Shutter DC module with SmartThings and an RF 433Mhz tube motor he bought from Amazon, however he said it did not work for this reason,
So I needed a 12V DC standard motor with no remote and no RF 433Mhz as I planned on using a Z-Wave Qubino Flush Shutter DC module.
So I contacted my usual supplier on Aliexpress Scott from Friend Group their store has been renamed to Runxin Blinds Store however its the same people.
I gave Scott my requirements and measurements and he said he could supply me a standard 12V DC motor in a 38mm diameter tube.
To pick a fabric colour I was given this link here. I've picked colour B121 which looks to be a light cream colour I hope !
Other colours available:
These were the measurements of my Windows internal recess, which I sent to Scott. For my window size the cost was $135 USD.
The construction of the Zebra blinds, they also call them Rainbow blinds on the Aliexpress store, they have a metal cassette style header concealing the roller blind itself and a metal bottom bar.
Here is the proposed wiring diagram for the Qubino Flush Shutter DC module and the blinds 12v DC motor.
I don't plan to install and connect a physical switch with the Qubino module. I do have an existing switch near to this window connected to a Fibaro Roller Shutter module for my Z-Wave curtain track.
I figured I could just program the Fibaro Roller Shutter module for double clicks up and double clicks down on its wall switch to then control the Zebra blinds / Qubino module. This will save me the hassle of wiring in another switch and cabling in to that wall again.
I've only just ordered my motorised Zebra blind kit, so it will take some time to arrive from China, I have already got the Qubino Flush Shutter DC module here. In part two it will be the unboxing.